You are here: Books --> Effective Onscreen Editing 4th edition --> Word 2016 Chapter 15: Onscreen Proofreading
Vous êtes ici : Livres --> Effective Onscreen Editing 4th edition --> Word 2016 Chapter 15: Onscreen Proofreading
Chapter 15: Onscreen Proofreading
“A life spent making mistakes is not only more honorable, but more useful than a life spent doing nothing.”—George Bernard Shaw
“Quis emendet ipsos editores?” (Who shall edit the editors?)—Geoff Hart, with thanks to Christine Shuttleworth for Latin assistance
Software and reference links for all versions of Word
This Web page contains instructions on the following subjects:
Cost of omitting press proofs
Help with Acrobat
Mastering PDF editing
Side by side proofreading
Text to speech
Traditional proofreading marks in PDF
Cost of omitting press proofs
Omitting paper or press proofs can be an expensive error. See, for example, “Printing Goof Nullifies U.S. Reading Exam” (in the 20 November 2007 issue of the Washington Post).
Help with Acrobat
Adobe Acrobat is complex software, so it's useful to have access to some of the more relevant topics. Here are a few relevant help topics:
Mastering PDF editing
Need to learn how to edit PDF files efficiently? Check out Adrienne Montgomerie’s course on PDF editing.
Traditional proofreading marks in PDF
John Clifford has written up a description on how to use traditional proofreading marks in PDF files.
Side by side proofreading
Word 2010 allows "side by side" comparisons of documents in which you scroll simultaneously through both the documents. First, open the documents you want to compare in separate windows. Next, select the Ribbon's "View" tab and click the "View Side by Side" icon:

If you want the second document to scroll simultaneously as you scroll the first document, click the “Synchronous scrolling" icon:
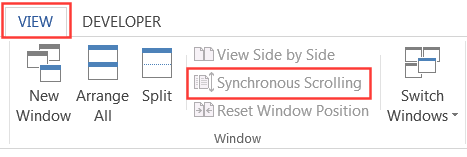
Click the "View Side by Side" icon again to cancel this feature.
Text to speech
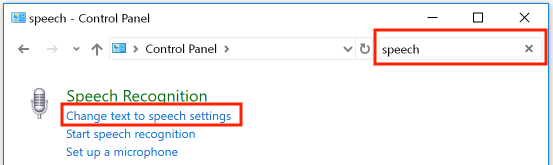
Windows can read selected text to you. First, define the voice settings. In Windows 10, open the "Control Panel" dialog box. In the search field at the top right side of the dialog box, type "speech". In the list of search results below that, click the link for "Change text to speech settings":
In the "Speech Properties" dialog box, select the voice you want Windows to use. Move the slider to select the speed of the reading. To rest the results, click the "Preview Voice" button:

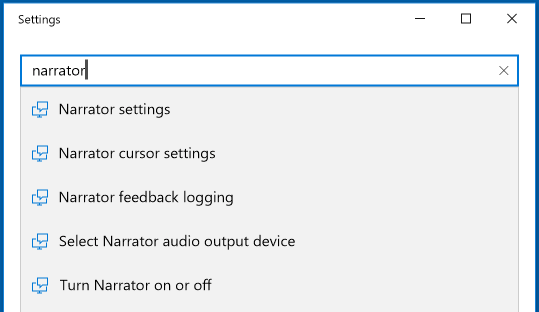
To start and stop Windows from reading text, you'll need to use the "Settings" dialog box (not the "Control Panel" dialog box). To get there, press the "Windows" key to the left of the spacebar, then scroll down to and select "Settings". Type "narrator" in the search field to display the various settings you can access:
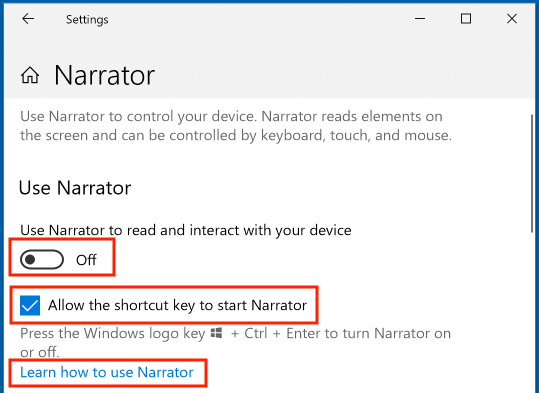
Select "Narrator settings" to turn Narrator on or off, to enable or disable the keyboard shortcut (Windows key + Control + Enter) that starts Narrator, or to gain access to Microsoft's tutorial for how to use Narrator:
You can also access Microsoft's Narrator tutorial via their Web site. Scrolll down in this dialog box to access controls for customizing which voice Narrator will use, as well as the voice's speed, pitch, and volume.
©2004–2025 Geoffrey Hart. All rights reserved.