You are here: Books --> Effective Onscreen Editing 4th edition --> Word 2016 Chapter 9: Spelling and Grammar Checkers
Vous êtes ici : Livres --> Effective Onscreen Editing 4th edition --> Word 2016 Chapter 9: Spelling and Grammar Checkers
Chapter 9: Spelling and Grammar Checkers
“I suppose we all have our foibles. I like the exact word, and clarity of statement, and here and there a touch of good grammar for picturesqueness; but that reviewer cares only for the last mentioned of these things. His grammar is foolishly correct, offensively precise. It flaunts itself in the reader’s face all along, and struts and smirks and shows off, and is in a dozen ways irritating and disagreeable... I write good grammar myself, but not in that spirit... This reviewer even seems to know (or seems even to know, or seems to know even) how to put the word ‘even’ in the right place; and the word ‘only,’ too. I do not like that kind of person. I never knew one of them that came to any good. A person who is as self-righteous as that will do other things.”—Mark Twain, Comment on Tautology and Grammar
Software and reference links for all versions of Word
This Web page contains instructions on the following subjects:
Automatic language recognition
Basic elements of the spellcheck pane
Example of creating an exclusion dictionary
Forcing Word to recheck the whole document
Grammar and spelling settings
Language of a word whose spelling is being checked
Learning and changing a word's language setting
Managing custom dictionaries in the Dictionaries dialog box
Pausing and resuming a spellcheck
Automatic language recognition
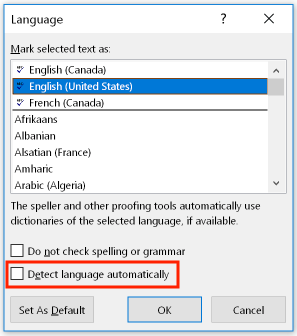
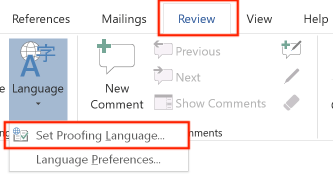
To enable or disable Word's ability to automatically recognize a language, select the Ribbon's "Review" tab, then open the "Language" icon's menu, then open the "Language" submenu and select "Set Proofing Language":
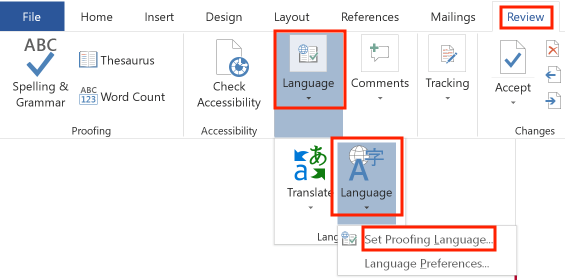
Select (or deselect) "Detect language automatically":
Basic elements of the spellcheck pane
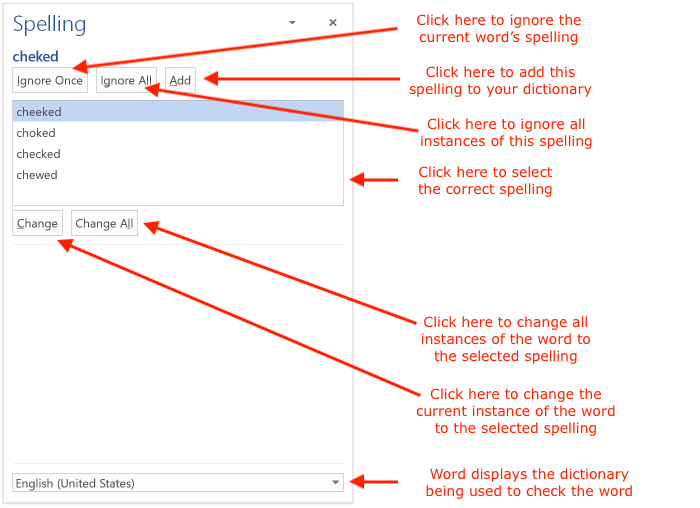
Note that the grammar and options settings that were present in Word 2010 have been removed, and are now only accessible via the "Options" dialog box, in the "Proofreading" tab. In addition, Word 2016 no longer provides a list of word definitions to help you decide whether the suggested replacement is the correct word.
Example of creating an exclusion dictionary
An exclusion dictionary lets you specify words that are correctly spelled, but that you nonetheless want Word to highlight during spellchecks so that you can confirm that they are being used correctly in their current context. I've provided a sample exclusion dictionary that you can copy and use in Word. Here's how to add these words to your exclusion dictionary:
In Word 2016, the exclusion files already exist, and you must edit them rather than creating them from scratch.
For Windows 10, look for these files in the following folder: C:\Users\[your name]\AppData\Roaming\Microsoft\UProof.
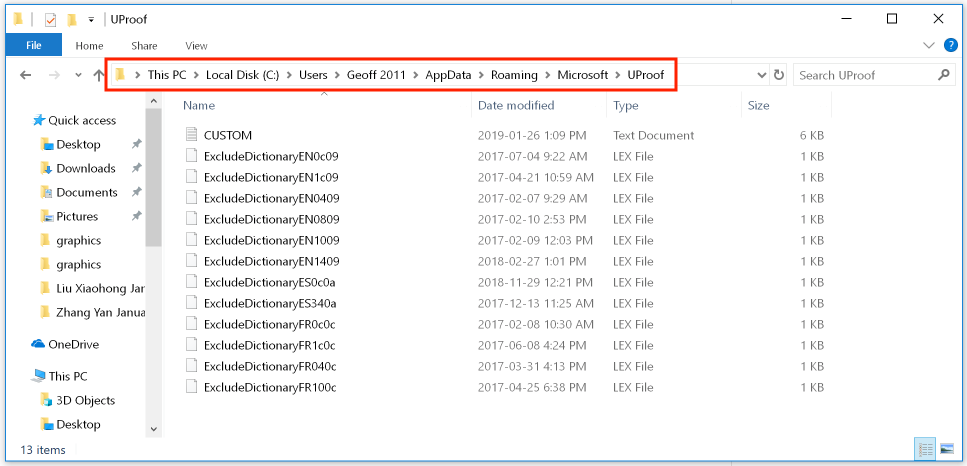
The file will have a name similar to the following: ExcludeDictionaryLanguageCodeLanguageLCID.lex. For example, the English exclusion dictionary is ExcludeDictionaryEN0409.lex. EN represents the language family (English), and the four numbers at the end of the name represent the location code (LCID). To learn the code for a given language, search the Web or Microsoft's Web site for the phrase "Locale identification numbers".
You can't edit the file directly within Word's dictionary dialog box, but Word can open the file easily enough: simply press Control+O to obtain the "Open file" dialog box, then navigate to the directory shown in the screenshot. (Note that depending on how you have configured Word, you may have to change the file types displayed to "All Files" for these files to be visible). If Word asks whether to convert the file format, click "No".
Edit the file (add, delete, or correct words), pressing Enter between words so that each word appears on a separate line. You can also copy the words from my provided sample exclusion dictionary to get you started. Save your changes. If Word asks you to specify a file format, choose "Speller Exclusion Dictionary" or "Plain Text". Close and restart Word.
Forcing Word to recheck the whole document
If Word refuses to spellcheck individual words or even large portions of the text, this is usually because it thinks it has already checked those words. There are various ways to force Word to recheck the whole document. First, try the built-in method. Open the "File" menu, select "Options", and then select the "Proofing' tab. In the "Proofing" tab, click the "Recheck Document" button at the bottom of the dialog box:

If this approach doesn't work, there are two ways you can sometimes trick Word into checking the whole document. First, if the manuscript has not been prepared using paragraph or character styles, there's a quick (but not recommended) way to force a recheck. Select the Ribbon's "Review tab", and turn off revision tracking. Next, select all of the text (press Control+A). In the "Review" tab, open the "Language" icon's menu and select "Set Proofing Language":
From the list of available dictionaries, choose a different language (e.g., Canadian French) to apply to the text:
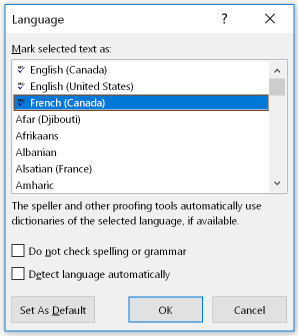
Click the "OK" button to apply this language. Then repeat these steps to restore the original language (e.g., English United States).
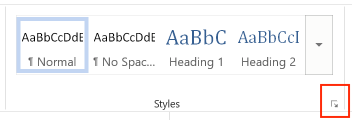
The second method is safer if the author has used paragraph or character styles to define the spellcheck language for paragraphs, words, or phrases. Then, all you need to do is edit the properties of the styles. To do so, select the Ribbon's "Home" tab, then display the style palette by clicking the inconspicuous icon at the bottom right of the list of styles:
In the Style Palette, select the style you want to modify, then click the small downward arrow to the right of its name to display the options for that style. Select "Modify":
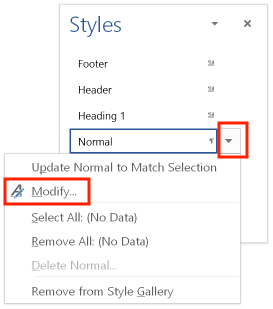
In the "Modify Style" dialog box, open the "Format" menu and select "Language":
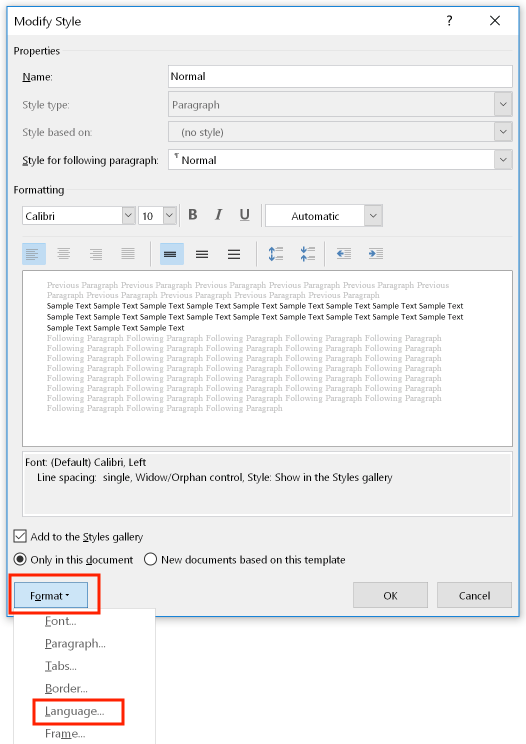
Choose a new language for the style, then click OK to apply that language setting to all text that has been formatted with that style. Repeat this process for all styles used in the document. Then modify the styles again to use the original spellcheck language. You should now be able to check the spelling.
Grammar and spelling settings
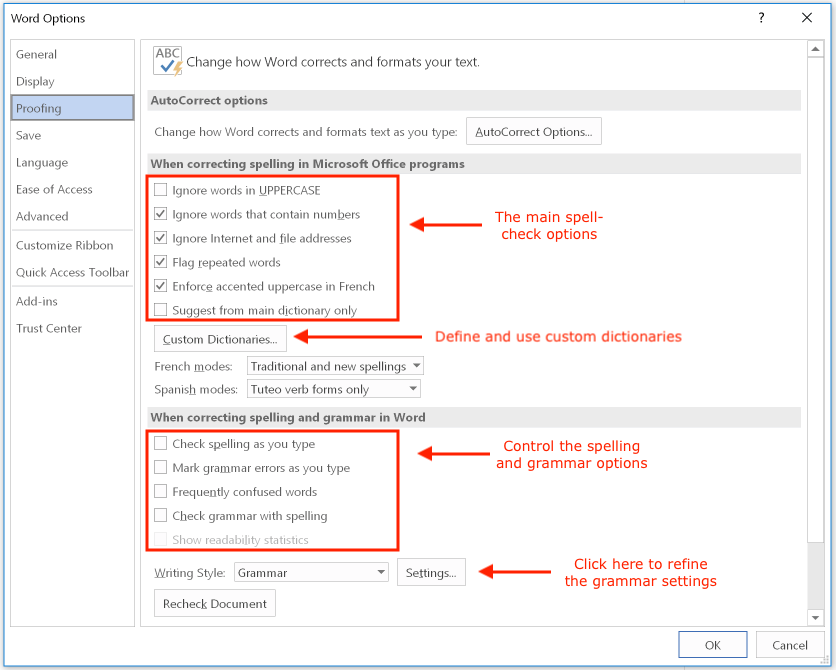
To access the grammar and spelling settings, open the "File" menu and select "Options". Select the "Proofing" tab to gain access to the main spelling settings:
Language of a word whose spelling is being checked
When Word's spellchecker examines a word's spelling, it displays the dictionary it is using at the bottom of the spellcheck dialog box:
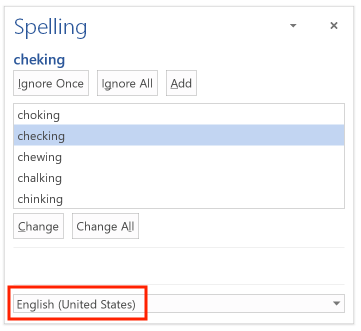
This language named here will change whenever Word moves to a word that has been defined to use a different language. If Word incorrectly identifies a correctly spelled word as an error, this language setting may be the problem.
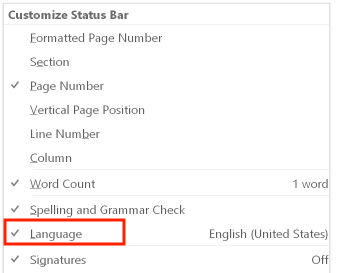
Learning and changing a word's language setting
Word 2016 displays the language of a selected word or phrase (i.e., the dictionary that was defined to use during spellchecks) in the status bar at the bottom of the document window:
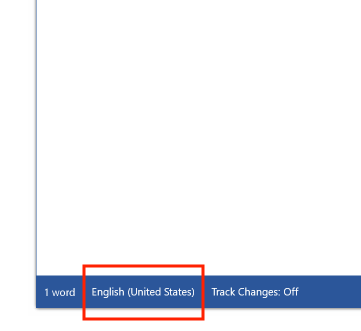
If you don't see the language, right-click or Control-click on the status bar. From the "Customize Status Bar" menu, select "Language":
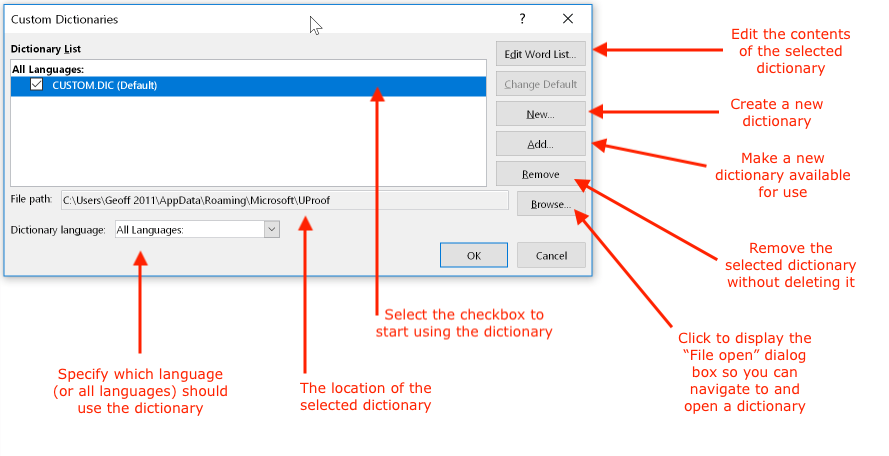
Managing custom dictionaries in the Dictionaries dialog box
To manage your dictionaries, open the "File" menu and select "Options". Select the "Proofing" tab, then click the "Custom Dictionaries" button:

The "Custom Dictionaries" dialog box offers many options:
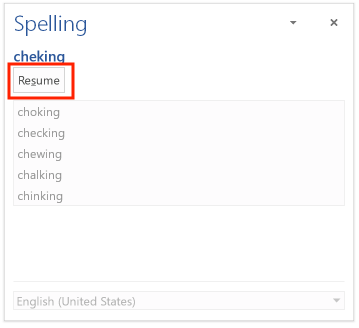
Pausing and resuming a spellcheck
If you pause during a spellcheck so that you can click in the document and make a change, including changes unrelated to spelling, you can continue the spellcheck from where you paused. Click to select the "Spelling" dialog box, then click the "Resume" button:
©2004–2025 Geoffrey Hart. All rights reserved.