You are here: Books --> Effective Onscreen Editing 4th edition --> Word 2016 Chapter 5: Using Revision Tracking
Vous êtes ici : Livres --> Effective Onscreen Editing 4th edition --> Word 2016 Chapter 5: Using Revision Tracking
Chapter 5: Using Revision Tracking
“Elinor agreed to it all, for she did not think he deserved the compliment of rational opposition.”—Jane Austen, Sense and Sensibility
Software and reference links for all versions of Word
This Web page contains instructions on the following subjects:
Comparing and combining documents
Editor name changes to "Author" (anonymous reviews)
Explanation of icons in the Ribbon's review tab
Highlighter marker tool
Reviewing pane
Show Markup and Show for Review menus
Side-by-side display with synchronous scrolling
Styles palette
Track changes options
Comparing and combining documents
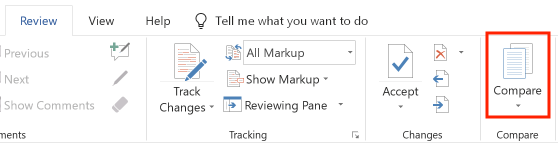
To compare two documents or combine multiple documents that contain tracked changes, select the Ribbon's "Review" tab and then click the "Compare" icon:
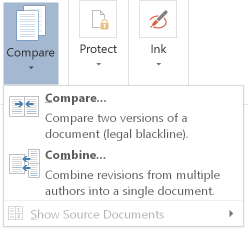
Open the menu to choose between comparing and combining documents:
If you select the Compare option, Word lets you choose which two documents to compare:
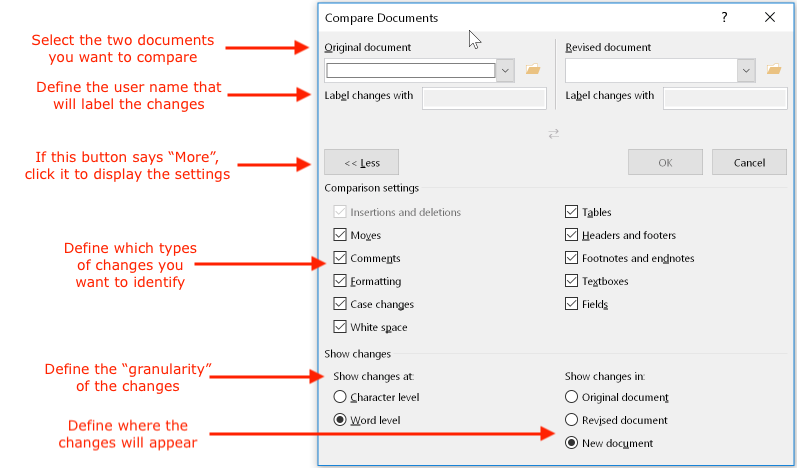
The "user name" used to label the changes will typically be the name of the person (e.g., the editor) who is creating the summary document. The "granularity" of the changes represents whether fixing a simple typo will show individual changed letters ("Character level") or the entire corrected word ("Word level").
The "Combine Documents" option offers essentially the same dialog box. The only difference is that you can repeat the selection to add another document for comparison with the original document.
Editor name changes to "Author" (anonymous reviews)
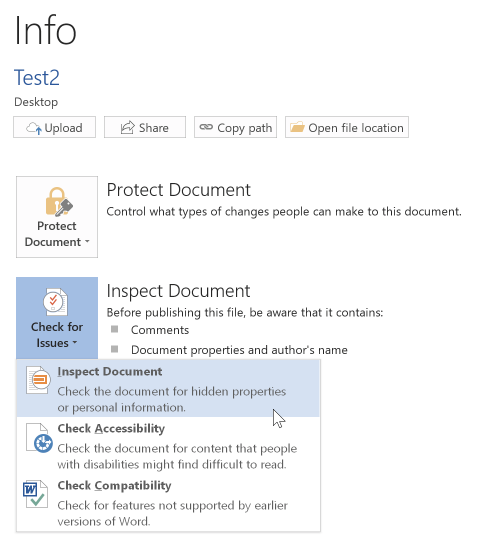
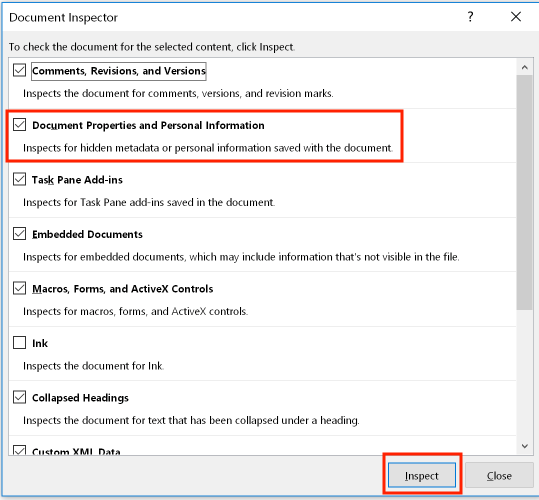
Word 2016 lets you remove your personal information from a document when you save it, which is useful if (for example) you need to do an anonymous review of a document. To do so, open the "File" menu, then select "Info". In the "Info" dialog box, open the menu beside "Inspect Document" and select "Inspect Document":
In the "Document Inspector" dialog box, select the checkbox for "Document properties and personal information", then click the "Inspect" button:
If Word finds any personal information that should be removed, such as the editor's name, it will display a "Remove All" button. Click that button:
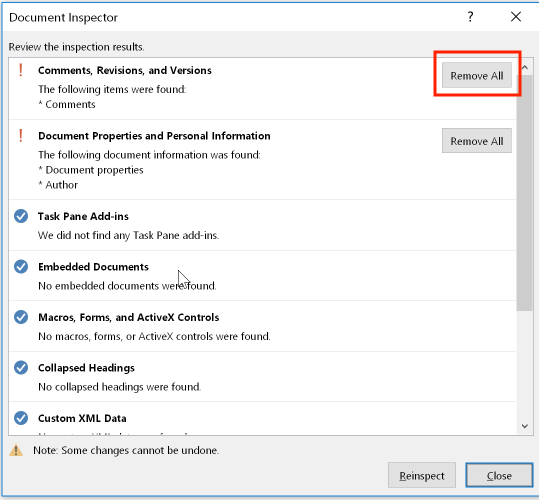
Note that the personal information will remain visible until you close and reopen the document. If that option is unavailable, something else may be causing the problem. Check Appendix III for possible solutions.
Yes, this is really bad design. If you expect to do this more than once, you'll probably want to record a macro rather than trying to remember all these steps.
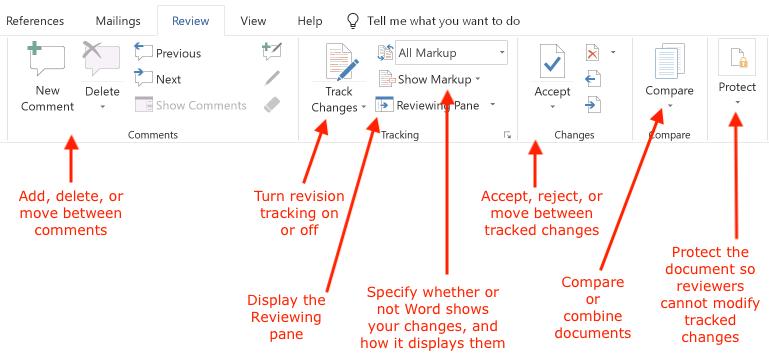
Explanation of icons in the Ribbon's review tab
The Ribbon's Review tab is where you control all of Word's revision tracking features. Here's a summary of the functions of the key parts of the tab:
More details are provided in the book and elsewhere on this page.
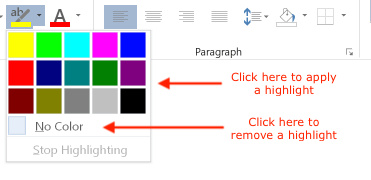
Highlighter marker tool
The highlighter marker lets you apply a highlight color to or remove it from selected text. To access the tool, select the Ribbon's "Home" tab:
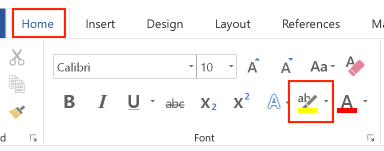
To apply or remove a color, select the text and then open the menu beside this icon. Click "No Color" to remove an existing color, or a color swatch to apply a color:
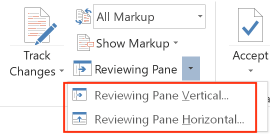
Reviewing pane
If you prefer to show your edits in a separate pane (a sub-window attached to the main document window), open the menu beside "Reviewing Pane". You can now choose to show that pane vertically (to the left of the document) or horizontally (below the document):
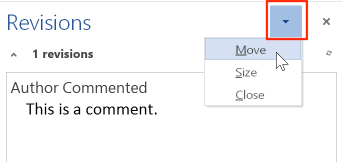
You can also use the menu at the top of the Reviewing Pane to resize this pane or move it to a new position that's more convenient for you:
Show Markup and Show for Review menus
In addition to changing the format and color of tracked changes, Word lets you decide whether or not to show your changes, and which categories of changes to display at a given time. First, select the Ribbon's Review tab, then opening the "Show for Review" menu:
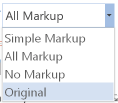
Unfortunately, Microsoft took what used to be a clear and straightforward terminology, and changed it to something incomprehensible: "Simple Markup" shows the text that results from your changes, with vertical revision lines in the margin if you've set the revision tracking preferences to show those lines. "All Markup" shows the detailed changes that produced the simple markup. "No Markup" shows the final version of the document if the author accepts all of your changes. "Original" shows the original unedited manuscript.
What you actually see when you select these options depends on which changes you choose to show. This is achieved under the "Show Markup" menu:
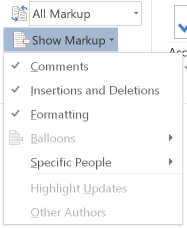
Here, for example, I have chosen to show only comments, insertions and deletions, and format changes. The "Balloons" menu lets you further specify how to use balloons in the right margin to show your changes, and the "Specific People" menu lets you choose which reviewer's comments should be displayed.
Note that even if you can't see the tracked changes, they will still be present in the file. You just won't be able to see them unless you choose a combination of options that reveals those changes.
Side-by-side display with synchronous scrolling
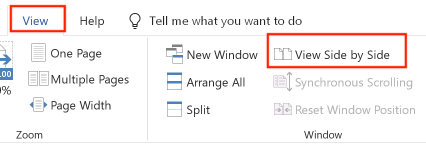
Word lets you automatically display two documents, side by side, to facilitate comparisons. To accomplish this, select the Ribbon's "View" tab, then click the "View Side by Side" icon:
Click the icon again to cancel this feature. Once you have two documents displayed side by side, you can set Word so that if you scroll in one document window, the other document window will scroll at the same speed. To accomplish this, select the Ribbon's "View" tab, then click the icon for synchronous scrolling:

If the document window is sufficiently wide, the icon will be replaced by the words "Synchronous Scrolling", as shown in the first screen shot in this section. Click the icon again to cancel this feature.
Styles palette
To display the Styles palette, select the Ribbon's "Home" tab, then click the inconspicuous menu icon at the bottom right of the "Styles" group:

The "Styles" palette provides access to all properties of your styles and how they are displayed:
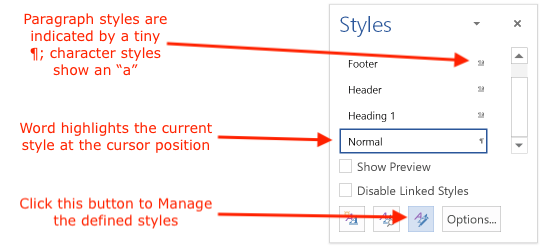
To modify the selected style, move the cursor beside the indicator of whether something is a paragraph or character style (¶ or "a") until a menu arrow appears, then click that arrow and select "Modify":
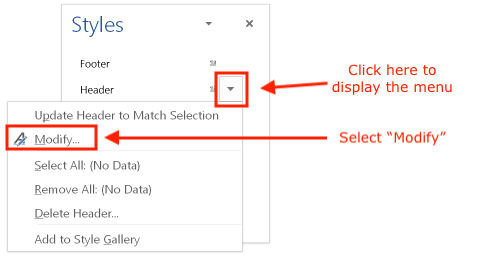
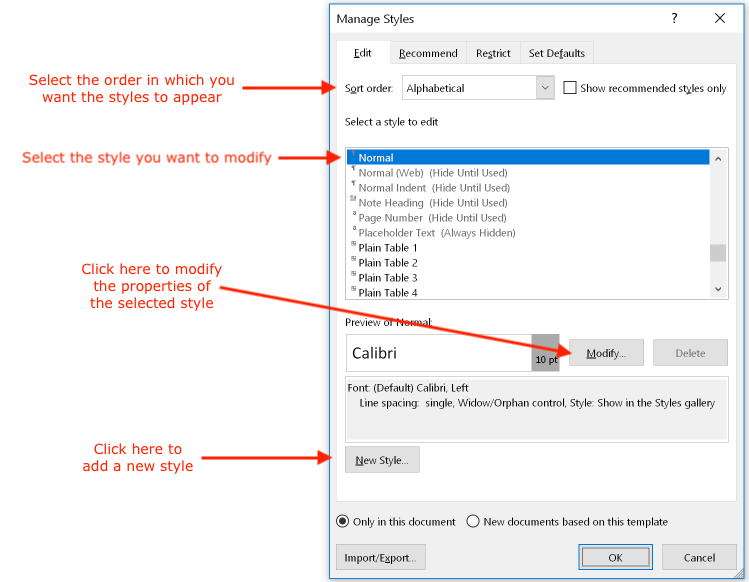
Alternatively, click the "Manage" button shown earlier in this section to display the "Manage Styles" dialog box. Select a style you want to modify, then click the "Modify" button:
Track changes options
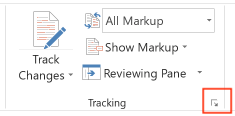
To access the track changes options, select the Ribbon's "Review" tab, then click the inconspicuous arrow at the bottom of the "Tracking" group:
Word will then display the "Track Changes Options" dialog box. Choose which type of changes you want to display and how balloons should function:
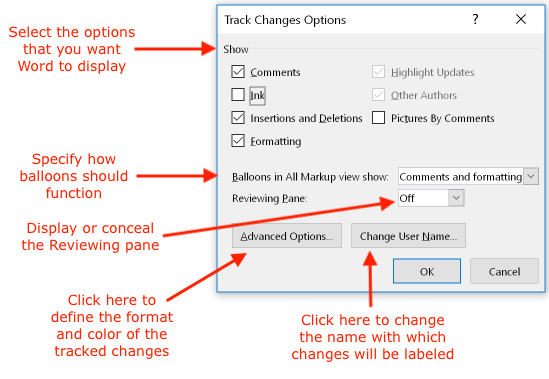
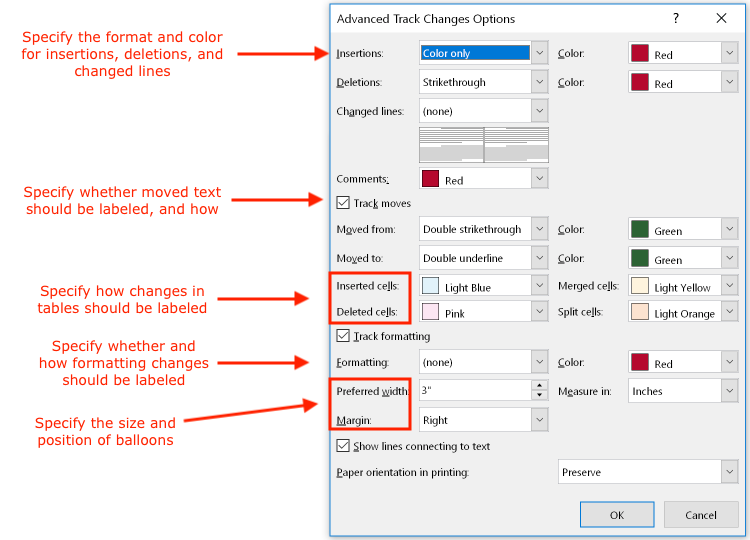
To control the format and color of the tracked changes, click the "Advanced Options" button:
©2004–2025 Geoffrey Hart. All rights reserved.