You are here: Books -->Write Faster--> Online stuff --> Chapter 14 links and screenshots
Vous êtes ice : Books --> Write Faster --> Online stuff --> Chapter 14 links and screenshots
Chapter 14. Automate Your Work Using Macros
Is something missing or wrong? Please contact me and I’ll fix the problem.
This page contains the following subjects:
Editing (revising) or running a macro
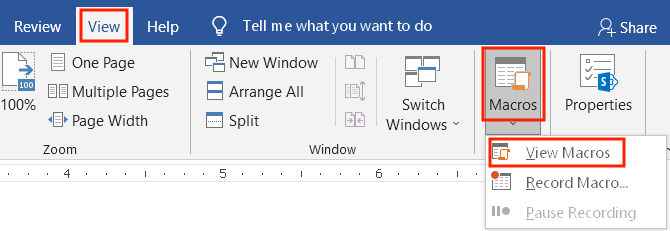
To edit (revise) or run a macro, select the Ribbon's View tab and open the menu beside the Macros icon. Select "View Macros":
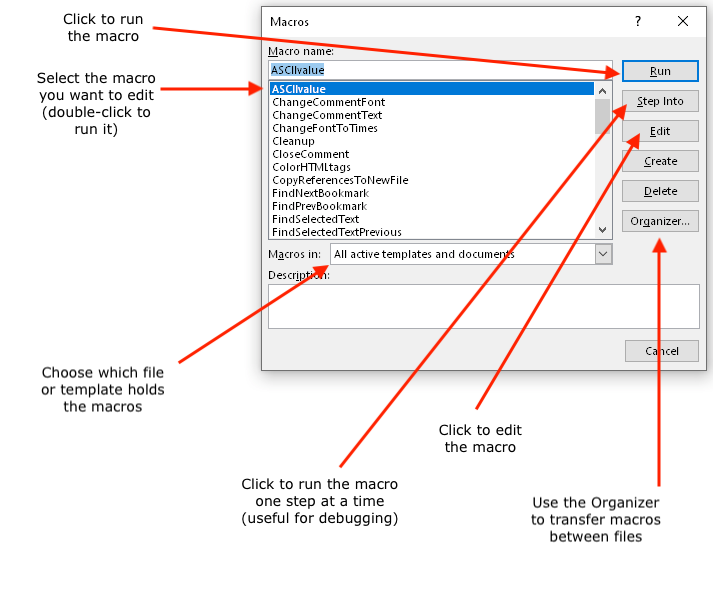
At the bottom of the dialog box, select the file or template that holds the macro, then select the macro you want to revise or run and click the "Edit" button or the "Run" button, respectivly:
The macro editor window looks intimidating, but all you need to worry about is (1) the text at the left of the window, which tells you which file and project you're editing, and (2) the text at the right side of the window, which contains the instructions stored in the macro:
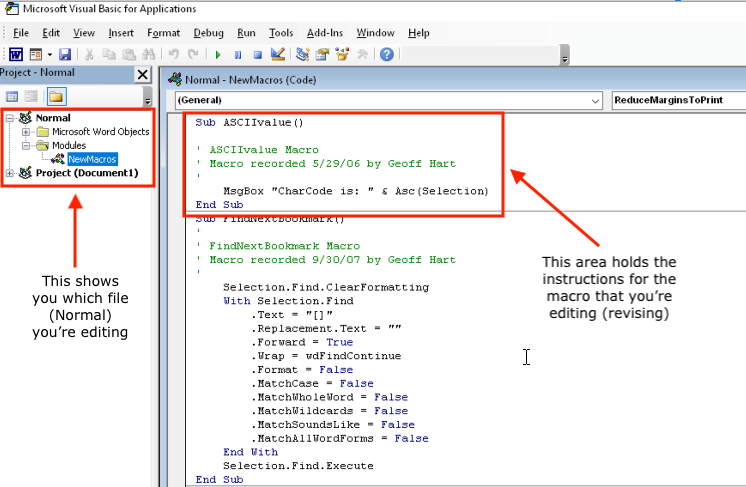
Simply click in the instructions area to revise its contents (e.g., to change the recording date). When you're done, press Command+S to save your changes, then Command+Q to quit the macro editor but keep Word running.
Macro for copying text into the Find dialog box
Copy the following text into the macro editor following the instructions in the chapter:
Sub FindSelectedText()
’ FindSelectedText Macro
Selection.Copy
’ Define selection as variable
Dim MyFoundText$
MyFoundText$ = Selection
Selection.Find.ClearFormatting
With Selection.Find
.Text = MyFoundText$
.Replacement.Text = “”
.Forward = True
.Wrap = wdFindAsk
.Format = False
.MatchCase = False
.MatchWholeWord = False
.MatchWildcards = False
.MatchSoundsLike = False
.MatchAllWordForms = False
End With
Selection.Find.Execute
End Sub
-------------------
Organizing templates
To gain access to the template manager dialog box, open the Files menu and select Options. In the "Add-ins" tab, open the "Manage" menu and select "Word Add-ins":
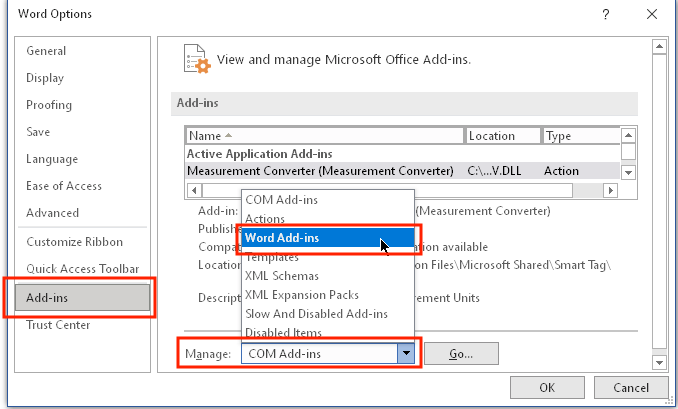
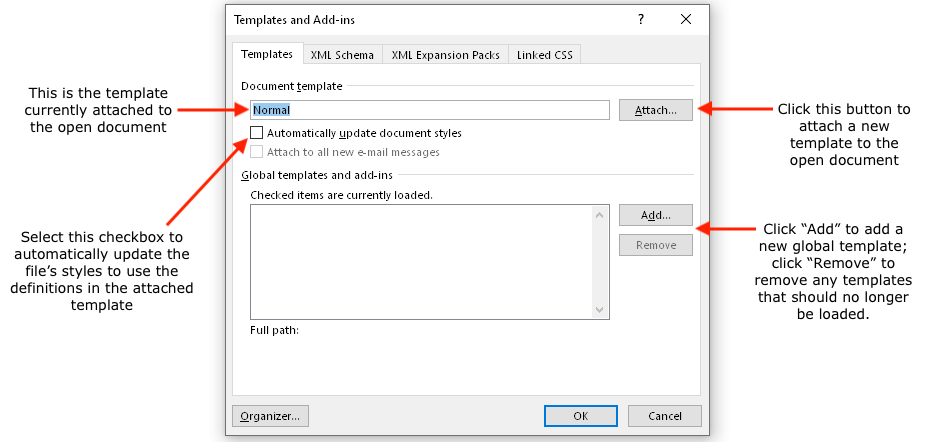
Click the "Go" button beside the menu to display the "Templates and Add-ins" dialog box. You can attach a new template to the open document, automatically update the styles in a document to agree with the styles in the template, and add or remove any global templates that are active:
Reasons you should automate things using macros
Save Time by Mastering the Basics
Recording a macro
To begin recording a macro, select the Ribbon's View tab and click the menu beside "Macros":
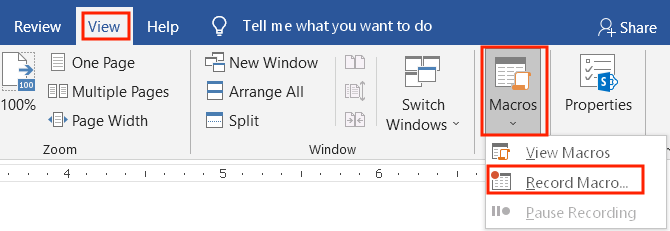
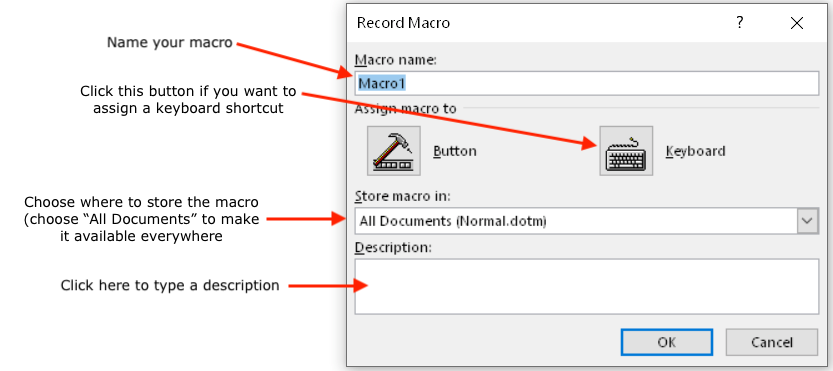
Select "Record Macro". In the resulting dialog box, make the following selections:
Perform all the steps that you want to record in your macro. If you need to pause the recording (e.g., while you type some text or change some Word setting that you don't want to include in the macro), open the Macro menu again and select "Pause Recording":

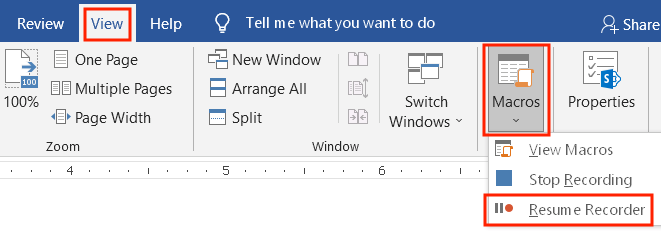
To start recording again, open the same menu but select "Resume Recorder":
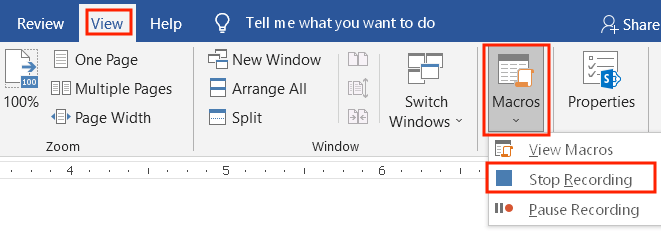
When you're done, select "Stop Recording":
References about writing and editing macros
Scripting references and software
Transferring macros between templates or documents
Macros can be stored in documents (and are then available only to that document) or in templates (and are then available in all files based on that template). To transfer macros to a new file so they will be available in that file, select the Ribbon's View tab, open the menu beside the "Macros" icon, and select "View macros":
In the View Macros dialog box, click the "Organizer" button:
You can now select the destination file (at left) that will receive the macros and the source file (at right) that will be the source of the macros. Click the "Close file" button to choose a new file; the button will change to "Open File", and when you click the button, you will see a standard File Open dialog box you can use to navigate to the new file. You can also click "Rename" button to rename the group of macros you selected (here, "NewMacros" to avoid groups with different names).

©2004–2025 Geoffrey Hart. All rights reserved.