The square brackets indicate the presence of a bookmark:

|
–Geoff-Hart.com: Editing, Writing, and Translation —Home —Services —Books —Articles —Resources —Fiction —Contact me —Français |
You are here: Books -->Write Faster--> Online stuff --> Chapter 5 links and screenshots
Vous êtes ice : Books --> Write Faster --> Online stuff --> Chapter 5 links and screenshots
Is something missing or wrong? Please contact me and I’ll fix the problem.
This page contains the following subjects:
The square brackets indicate the presence of a bookmark:
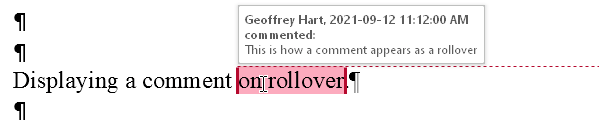
Here's what a comment looks like when you hold the cursor above it ("displaying on rollover"):
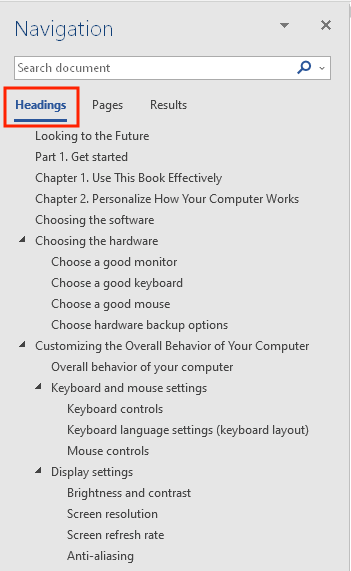
The navigation view appears to the left of the document window. If you select the headings tab, you'll see the list of all headings. Double-clicking on a chapter or heading name will scroll to that part of the document. If you instead select the "Pages" tab, you'll see a sequence of "thumbnails" (small images) that show the contents of each page.
Current versions of Windows Word no longer have menus, so you can't customize what you don't have. However, if you're using an older version of Word, I've provided a PDF that explains how to edit menus in older versions of Word.
A PDF that explains how to edit menus in Word 2011 and older versions.
Field codes can be toggled to show their value:
Or they can be toggled to show the contents of the code:
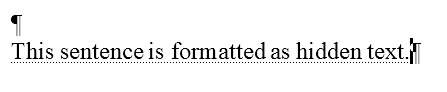
Word indicates that text is formatted as "hidden" by using dotted underlines:
If you don't change the view settings to display hidden text, you won't see these words.
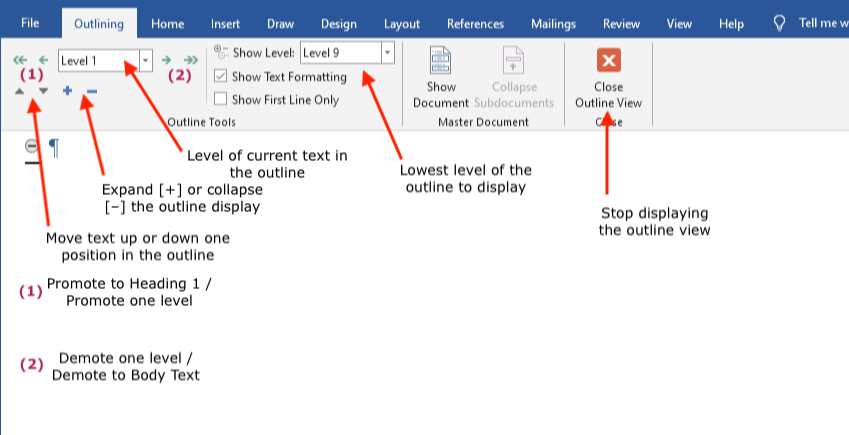
The Outlining toolbar offers many functions for controlling how the outline appears:
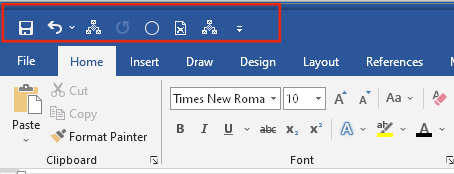
The Quick Access Toolbar is located at the top left of a document window, above the menus:
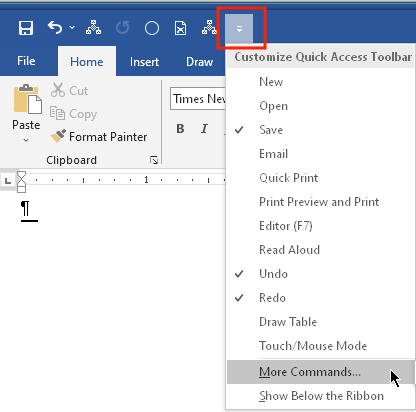
To add or remove functions from the Quick Access Toolbar, click the icon at the right edge to display a menu of the options:
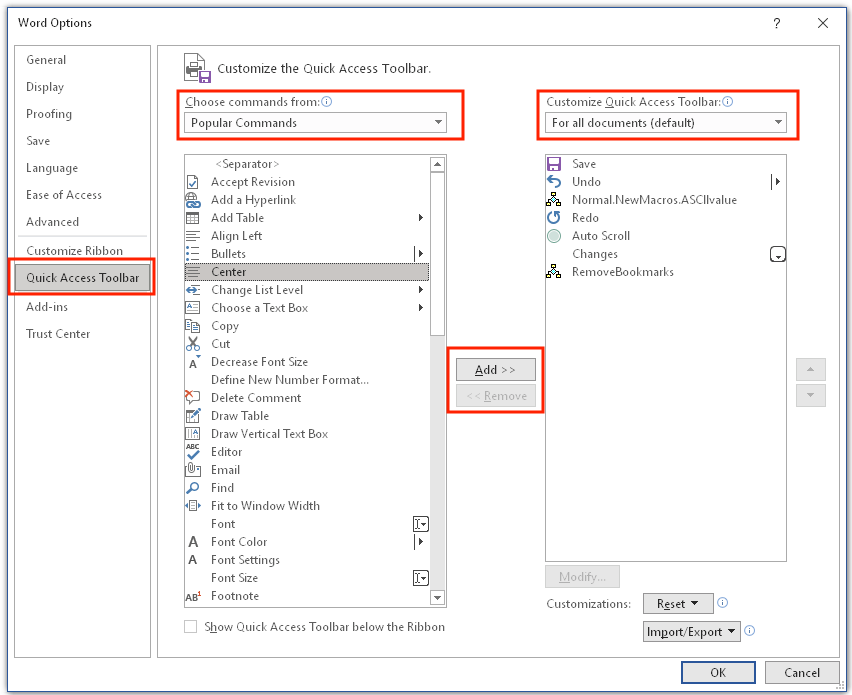
Select commands to add them to the toolbar; deselect commands to remove them. Click "More Commands" to gain access to the complete list of Word's commands. Select "Quick Access Toolbar", the category of commands, which document or template should have access to the customized toolbar, and the specific command you want to add, then click the [>] button to add it to the toolbar:
To remove a command, select it under the heading "Customize Quick Access Toolbar", then click the "Remove" button.
The Ribbon is the group of tabs and icons at the top of the document window:
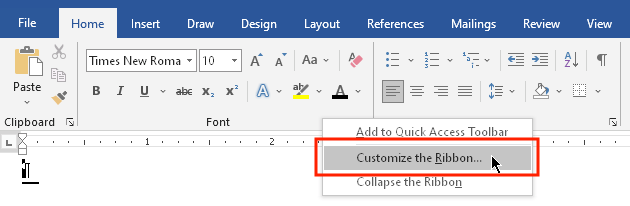
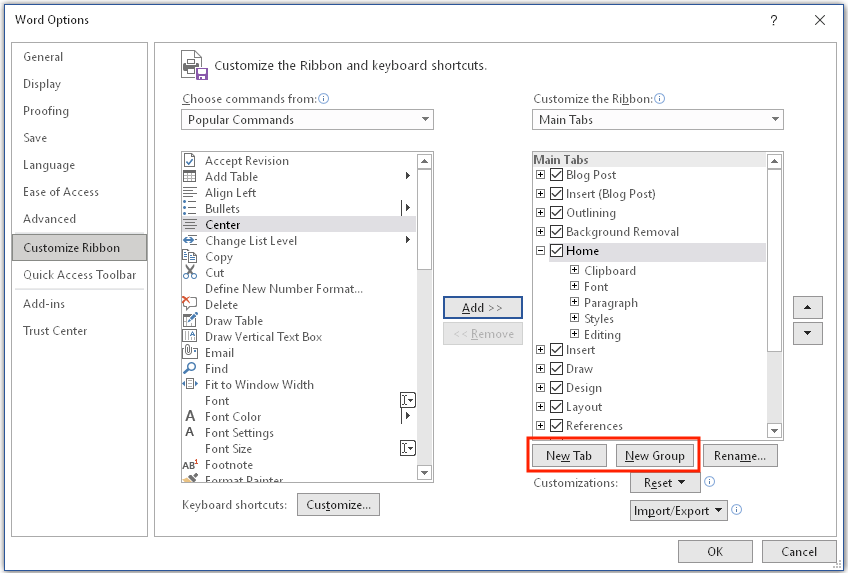
To customize the Ribbon, right-click or Control-click on any open (grey) space in the Ribbon. Select "Customize the Ribbon" from the resulting menu:
At the left side of the dialog box, select "Customize Ribbon" if it is not already selected. To add commands to the Ribbon, you must first create a custom tab to hold the commands. To do so, click the "New tab" button (or "New Group" if you want to add groups to a new tab) at the bottom of the list of tabs and choose a name for the tab:
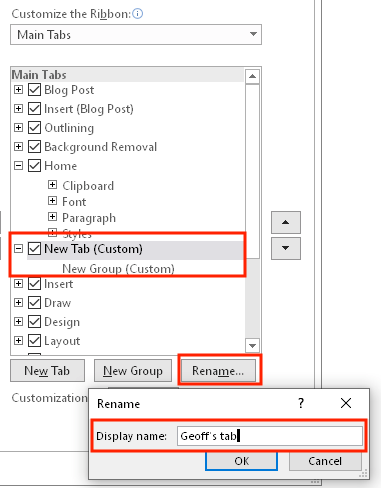
Select your new tab, click the "Rename" button, and give it a new name:
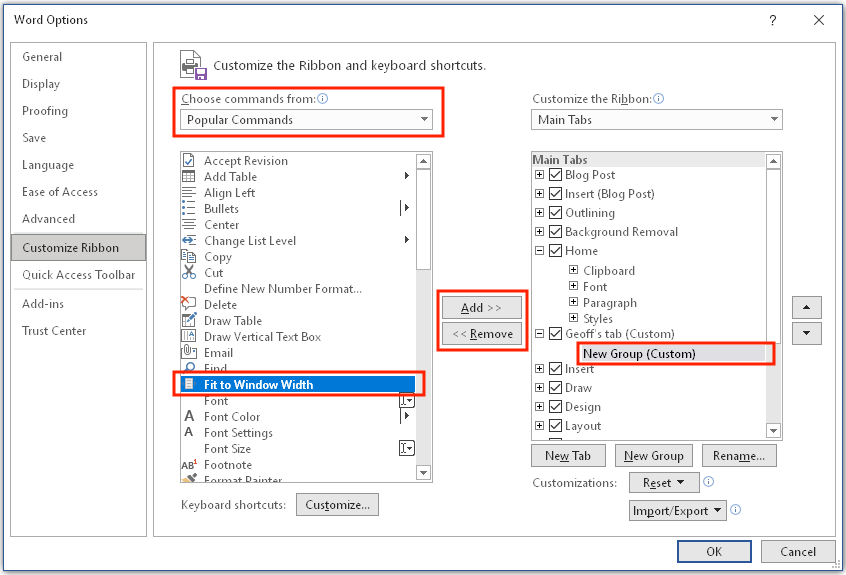
Rename the tab that Word automatically added by selecting it and clicking the "Rename" button. Next, on the left side of the dialog box, select the category of commands and the specific command you want to add to the Ribbon (here, "Fit to Window Width"); on the right side, select the tab and group you want to add the file to (here, "Geoff's tab" and "New group (Custom)"). Click the "Add" button to add this command to the new tab:
To remove a command from a tab, select the command, then click the "Remove" button. To change the order of commands in your custom tab, drag each command to its new position.
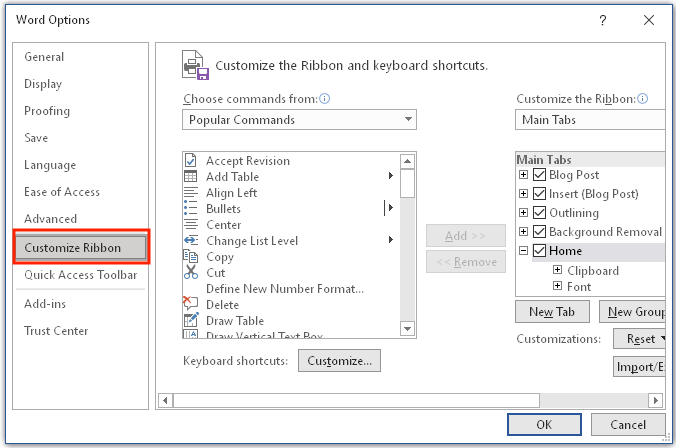
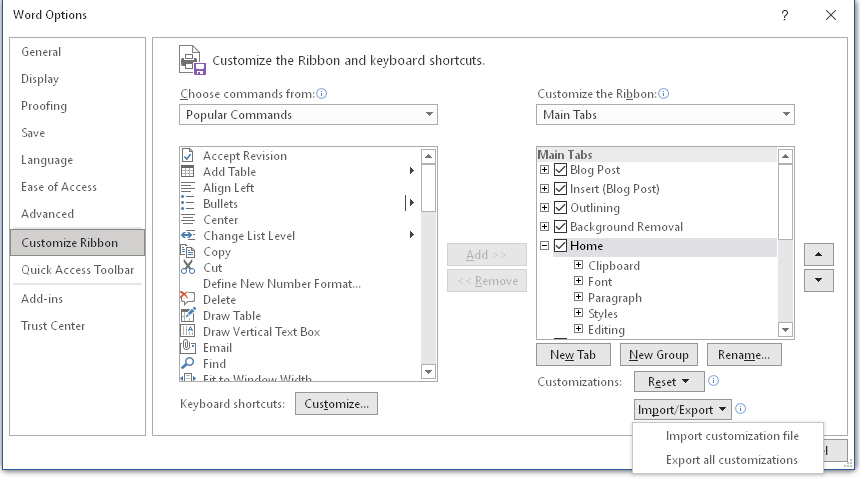
To move a customized Ribbon to another computer, open the File menu and select "Options" to display the Word Options dialog box. In that dialog box, select "Customize Ribbon":
At the bottom right of the Customize Ribbon dialog box, open the Import/Export menu and select "Export all customizations":
Choose a location and name for the file, which you can now send to your new computer. Use the same menu on the new computer to import those customizations.
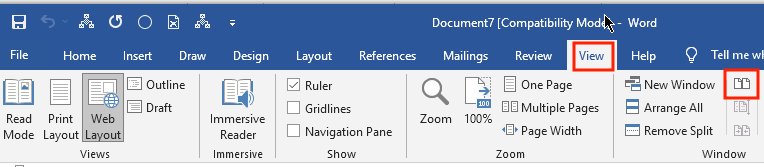
To begin, select the Ribbon's View tab and click the "Split" icon:
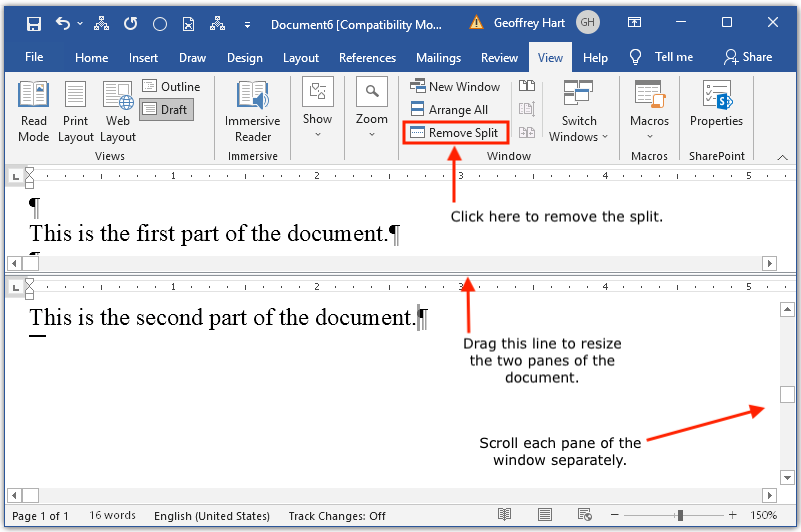
Next, drag the bar that represents the position of the split until the two parts of the document have the desired size:
You can now scroll independently in each part of the document. To unsplit the window, drag the grey bar that separates the panes to the top or bottom of the window, or click the "Remove Split" icon.
Toolbars have been removed from recent versions of MacWord, but if you're using an older version, I've provided a PDF file that describes how to work with Toolbars.
To gain access to the Track Changes options, click the tiny menu button under the "Tracking" icon:
From the menu button, select from the available options or click the additional menu to display the formatting options for tracked changes:
Select the Ribbon's View tab, then click the "View side by side" icon:
Click the same icon to return the windows to their previous positions.
For a list of Word's commends, consult the Word 2010 command finder.
©2004–2025 Geoffrey Hart. All rights reserved.